본문 바로가기

iOS

[번외편][실전] iOS 사용성 최대로 올려보자! UICollectionView Custom Layout

이 포스팅은 "[번외편] 사용성 최대로 올려보자!"의 Series  중 일부입니다.


[번외편][이론] iOS 사용성 최대로 올려보자! UICollectionView Custom Layout

[번외편][실전] iOS 사용성 최대로 올려보자! UICollectionView Custom Layout

[번외편] iOS 사용성 최대로 올려보자! Shimmer


이 포스트는 iOS 사용성 최대로 올려보자!  UICollectionView Custom Layout 실전편입니다.

이론편을 확인하고 오시면 더욱 이해하기 수월합니다.


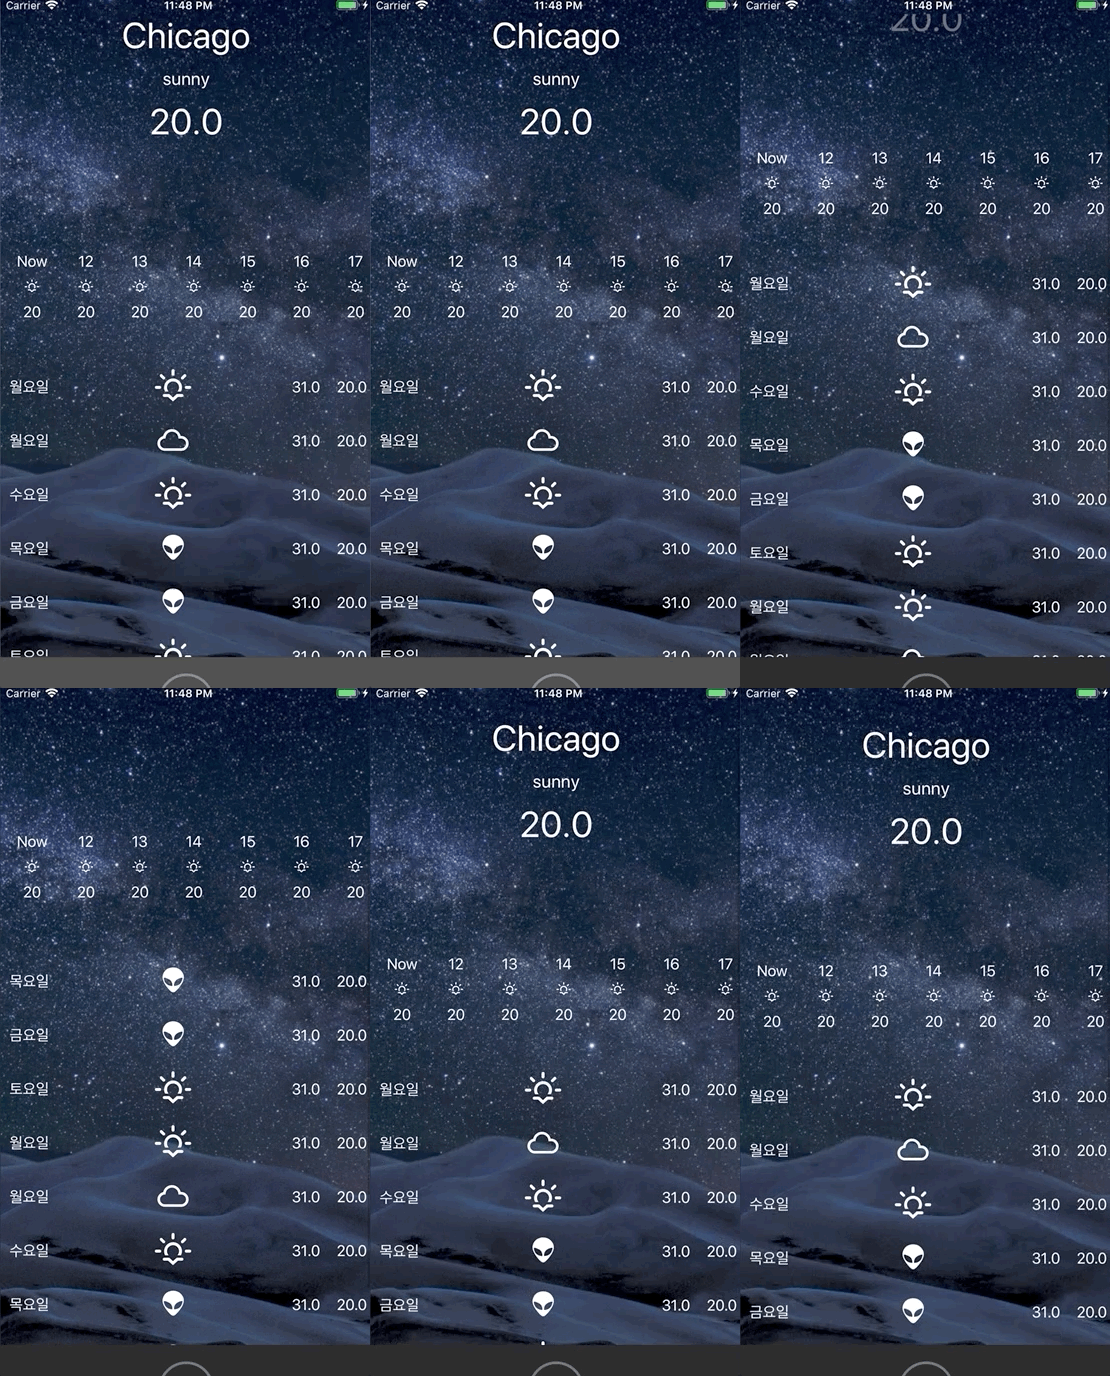
Demo


Layout 구성

Heights 

각 Cell 의 높이를 표시합니다.


Layouts

각 Cell 의 View 를 표시합니다.


Layout은 위와 같이 구성되어 있습니다. 


  • Srction 0 Header: HeaderView
  • Section 0 Cell :  Horizontal UICollectionView
  • Section 1 Cell : Vertical UICollectionView


자 이제 들어가봅시다!

이 예제는 CustomLayout.swift 만 다루고 있습니다.


Nested Vertical Scrolling

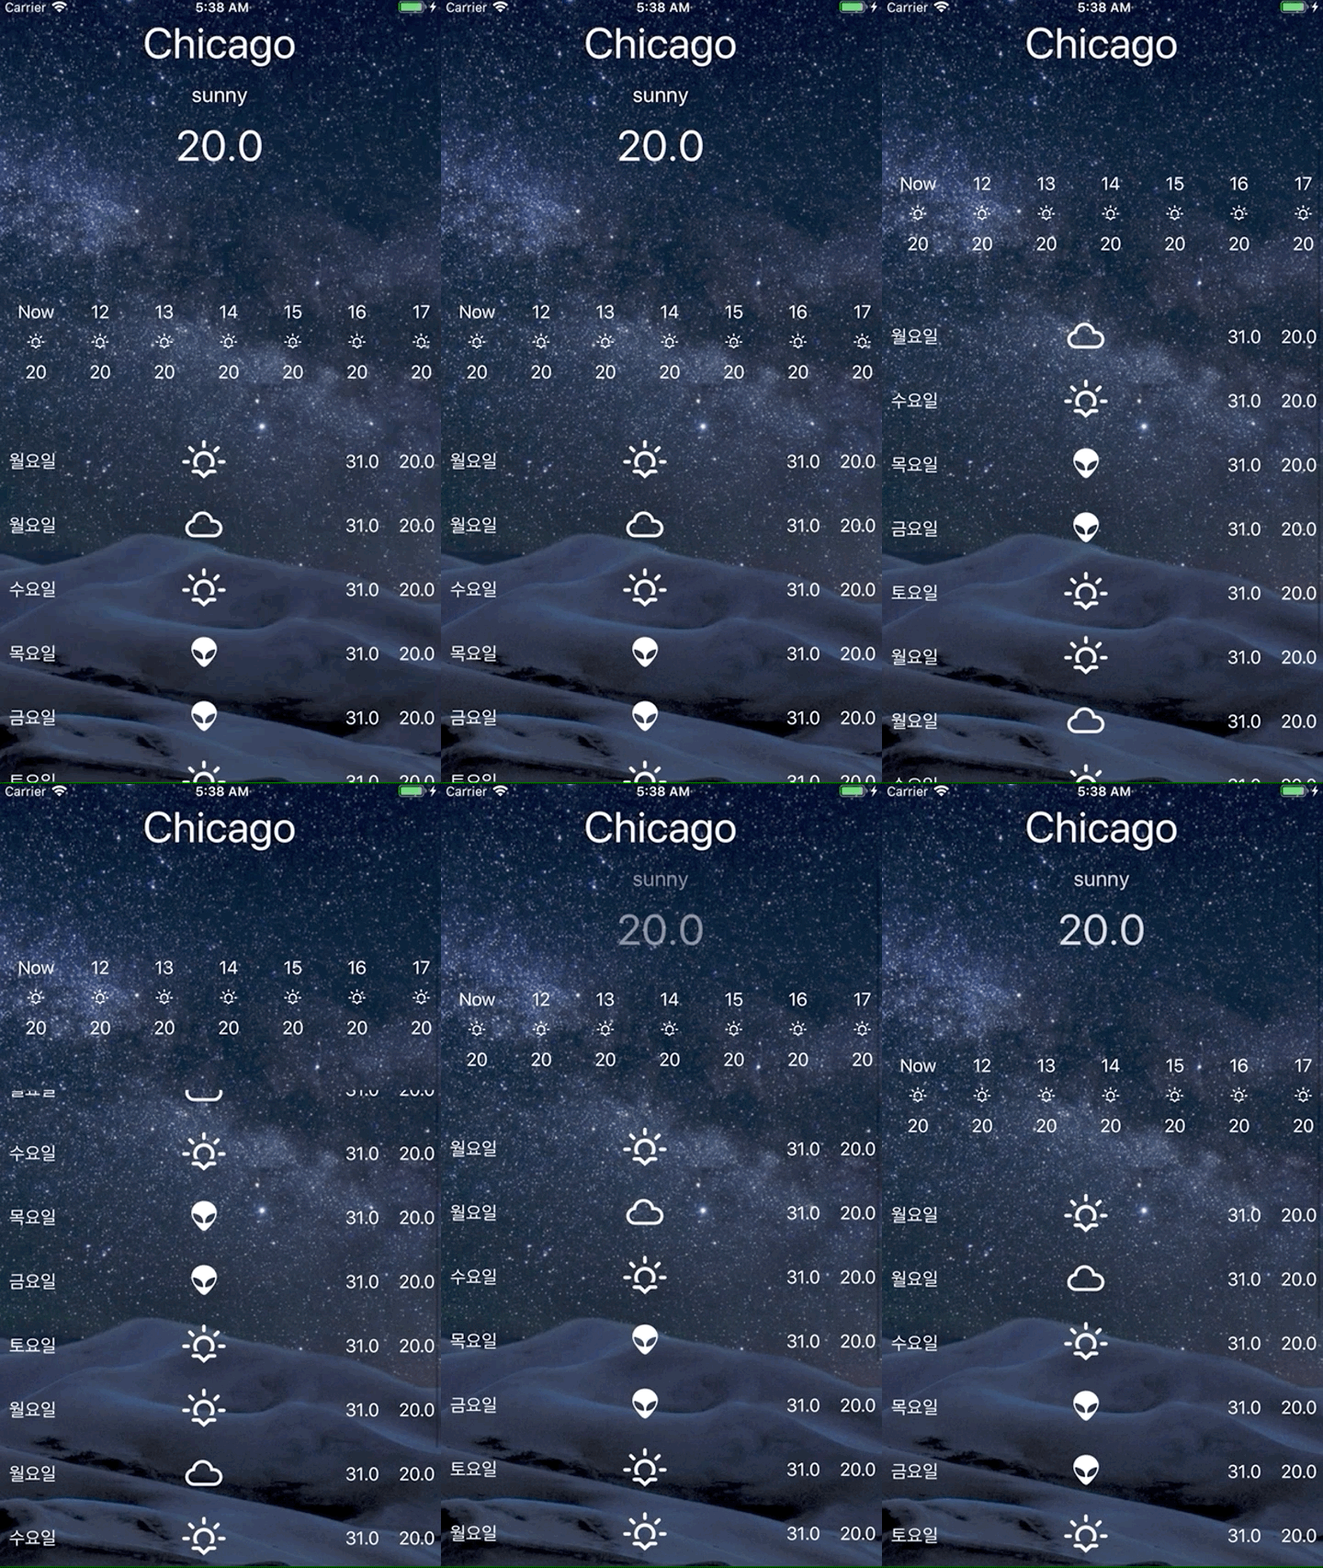
눈치채셨겠지만 Horizontal ContentSize 마지막까지 스크롤을 하게되면 Vertical은 스크롤이 되지 않습니다.


Vertical 스크롤이 동작하게 하기 위해선 


전체 UICollectionView 의 contentOffset 을 Vertical 로 전달해줘야 합니다.


class DayOfWeekVerticalContainerCell: UICollectionViewCell, NibForName {
override func awakeFromNib() {
NotificationCenter.default.addObserver(self, selector: #selector(handleSetOffset), name: Notification.Name(rawValue: NotificationNames.setOffset), object: nil)
}
@objc func handleSetOffset(notification: Notification) {
if let offset = notification.object as? CGFloat {
collectionView.contentOffset = CGPoint(x: 0, y: offset)
}
}
}
class ViewController: UIViewController {
func scrollViewDidScroll(_ scrollView: UIScrollView) {
let offsetY = scrollView.contentOffset.y
let headerHeightMaxChange = Metrics.HorizontalWeatherCellHeight
var subOffset: CGFloat = 0
if offsetY > headerHeightMaxChange {
subOffset = offsetY - headerHeightMaxChange
} else {
subOffset = 0
}
NotificationCenter.default.post(name: Notification.Name(rawValue: NotificationNames.setOffset), object: subOffset)
}
}


Sticky 

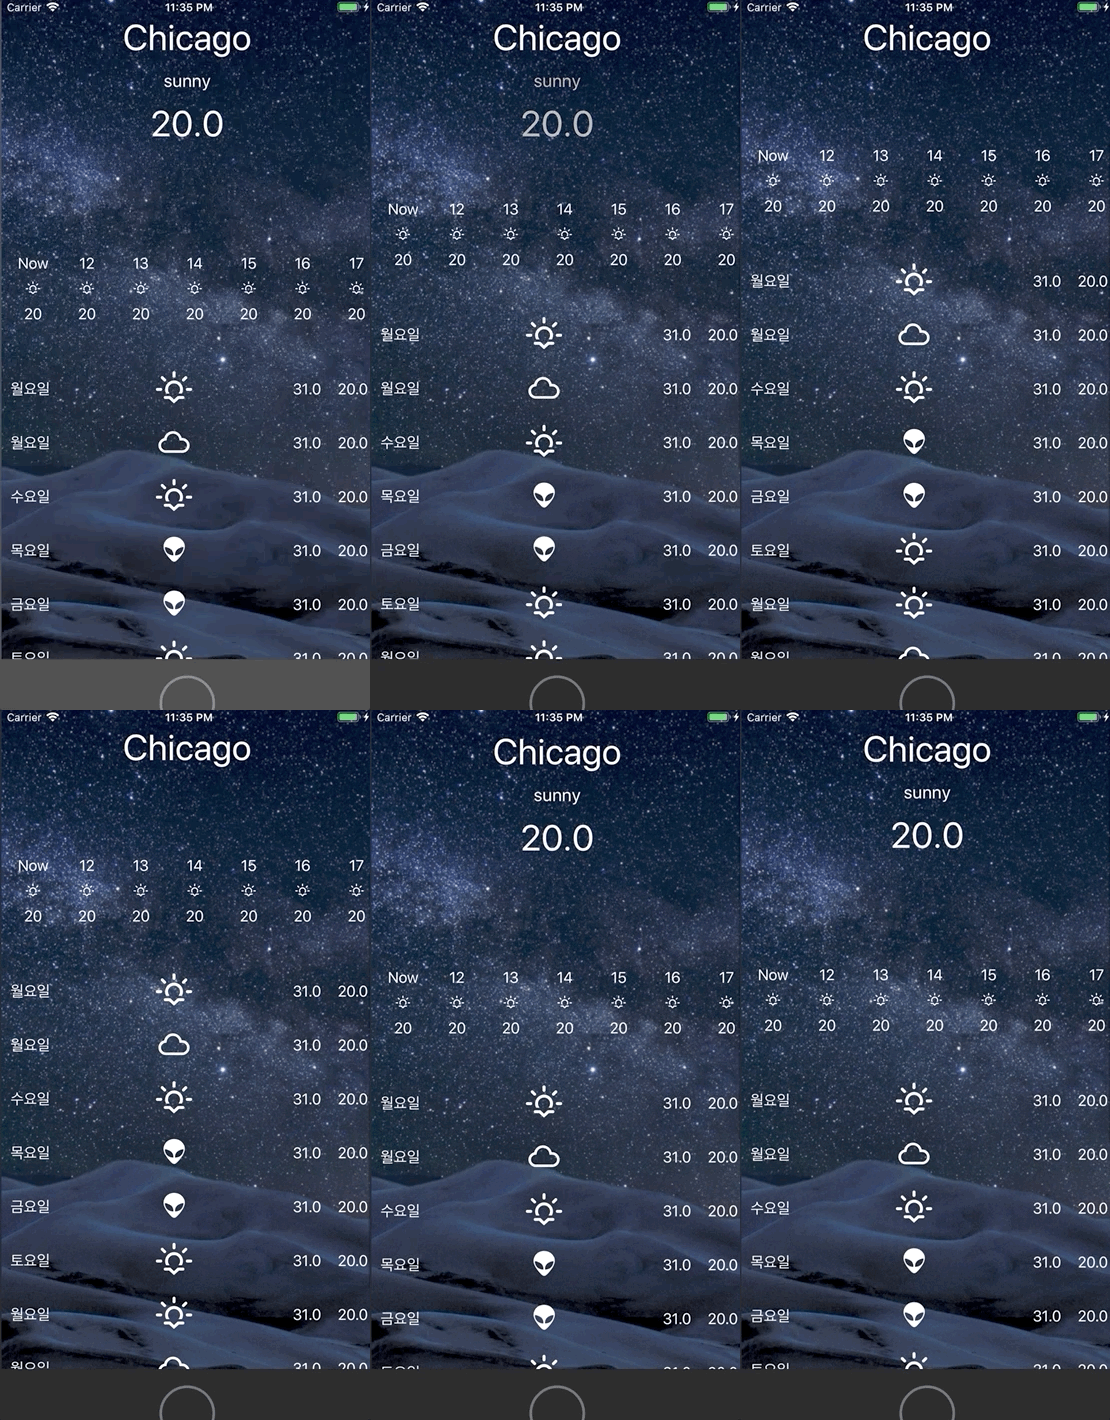
Sticky 가 적용되지 않은 그림을 확인해보죠! 


HeaderView 를 고정시키기 위해선 ContentOffset 에 따라서 HeaderView 의 위치를 조정해줄 필요가 있습니다.


extension CustomLayout {
override public func prepare() {
let sections = collectionView.numberOfSections
for section in 0..<sections {
let itemCount = collectionView.numberOfItems(inSection: section)
let layoutDelegate = collectionView.delegate as? UICollectionViewDelegateLayoutAttribute
if let flowDelegateLayout = collectionView.delegate as? UICollectionViewDelegateFlowLayout,
let headerSize = flowDelegateLayout.collectionView?(collectionView, layout: self, referenceSizeForHeaderInSection: section) {
let kind = UICollectionView.elementKindSectionHeader
let indexPath = IndexPath(item: 0, section: section)
let headerAttributes = layoutDelegate?.collectionView?(
collectionView,
kind: kind,
forSupplementary: indexPath
) ?? UICollectionViewLayoutAttributes(forSupplementaryViewOfKind: kind, with: indexPath)
prepareHeaderFooterElement(size: headerSize, kind: UICollectionView.elementKindSectionHeader, attributes: headerAttributes)
}
private func updateAttributes(collectionView: UICollectionView, attributes: UICollectionViewLayoutAttributes, indexPath: IndexPath) {
switch attributes {
case is OverlayAlphaLayoutAttributes:
attributes.transform = CGAffineTransform(translationX: 0, y: max(attributes.initialOrigin.y, contentOffset.y))
}
}
private func prepareHeaderFooterElement(size: CGSize, kind: String, attributes: UICollectionViewLayoutAttributes) {
guard size != .zero else { return }
switch kind {
case UICollectionView.elementKindSectionHeader:
guard let alphaAttr = attributes as? OverlayAlphaLayoutAttributes else { return }
alphaAttr.initialOrigin = CGPoint(x: 0, y: contentHeight)
attributes.frame = CGRect(origin: alphaAttr.initialOrigin, size: size)
attributes.zIndex = 1
contentHeight = attributes.frame.maxY
cache[.sectionHeader]?[attributes.indexPath] = attributes
default: break
}
}
}
view raw Sticky.swift hosted with ❤ by GitHub


initialOrigin 는 최초 View의 CGRect 상태 정보를 저장합니다.


attributes.transform = CGAffineTransform(translationX: 0, y: max(attributes.initialOrigin.y, contentOffset.y))


max(initialOrigin, contentOffset) 에서 큰 값을 transform으로 지정하면 Sticky Header 가 완성됩니다.


Header Alpha Animation

여기까지 오셨다면 Alpha animation 을 어떻게 동작시키는지 눈치채셨을 겁니다.


private func updateAttributes(collectionView: UICollectionView, attributes: UICollectionViewLayoutAttributes, indexPath: IndexPath) {
switch attributes {
case is OverlayAlphaLayoutAttributes:
let attributes = attributes as! OverlayAlphaLayoutAttributes
let headerSize = attributes.frame.size
let alphaVelocity: CGFloat = 1.4
attributes.headerOverlayAlpha = max(0, 1 - (contentOffset.y / headerSize.height) * alphaVelocity)
}
}
}
class SummaryHeaderView: UICollectionReusableView, NibForName {
override func apply(_ layoutAttributes: UICollectionViewLayoutAttributes) {
super.apply(layoutAttributes)
guard let layoutAttributes = layoutAttributes as? OverlayAlphaLayoutAttributes else {
return
}
temperature.alpha = layoutAttributes.headerOverlayAlpha
weatherDesc.alpha = layoutAttributes.headerOverlayAlpha
}
}


SummaryHeaderView에 SubViews alpha 속성을 지정


마무리

우리는 Custom Layout 의 강력한 기능을 학습하였습니다!


이제부터 Sticky 에 대해 겁낼 필요가 없겠죠? 


전체소스는 여기에서 확인할 수 있습니다.


소중한 시간 내어서 읽어주셔서 감사합니다

'iOS' 카테고리의 다른 글